

Yes I had a birthday this year!
My husband was so thoughtful and got a me
chocolate cake
They had an awesome pattern review for
Tilly & The Button's is located in England.

This is Tilly, isn't she adorable?

Here's Tilly's teaching studio.
Seeing this makes me want to catch the first flight to England.
Well...I loved the Orla Blouse and just had to get the pattern.
They have options for PDF downloads and paper patterns.
I wanted the real deal and bought a paper pattern,
yes all the way from England.
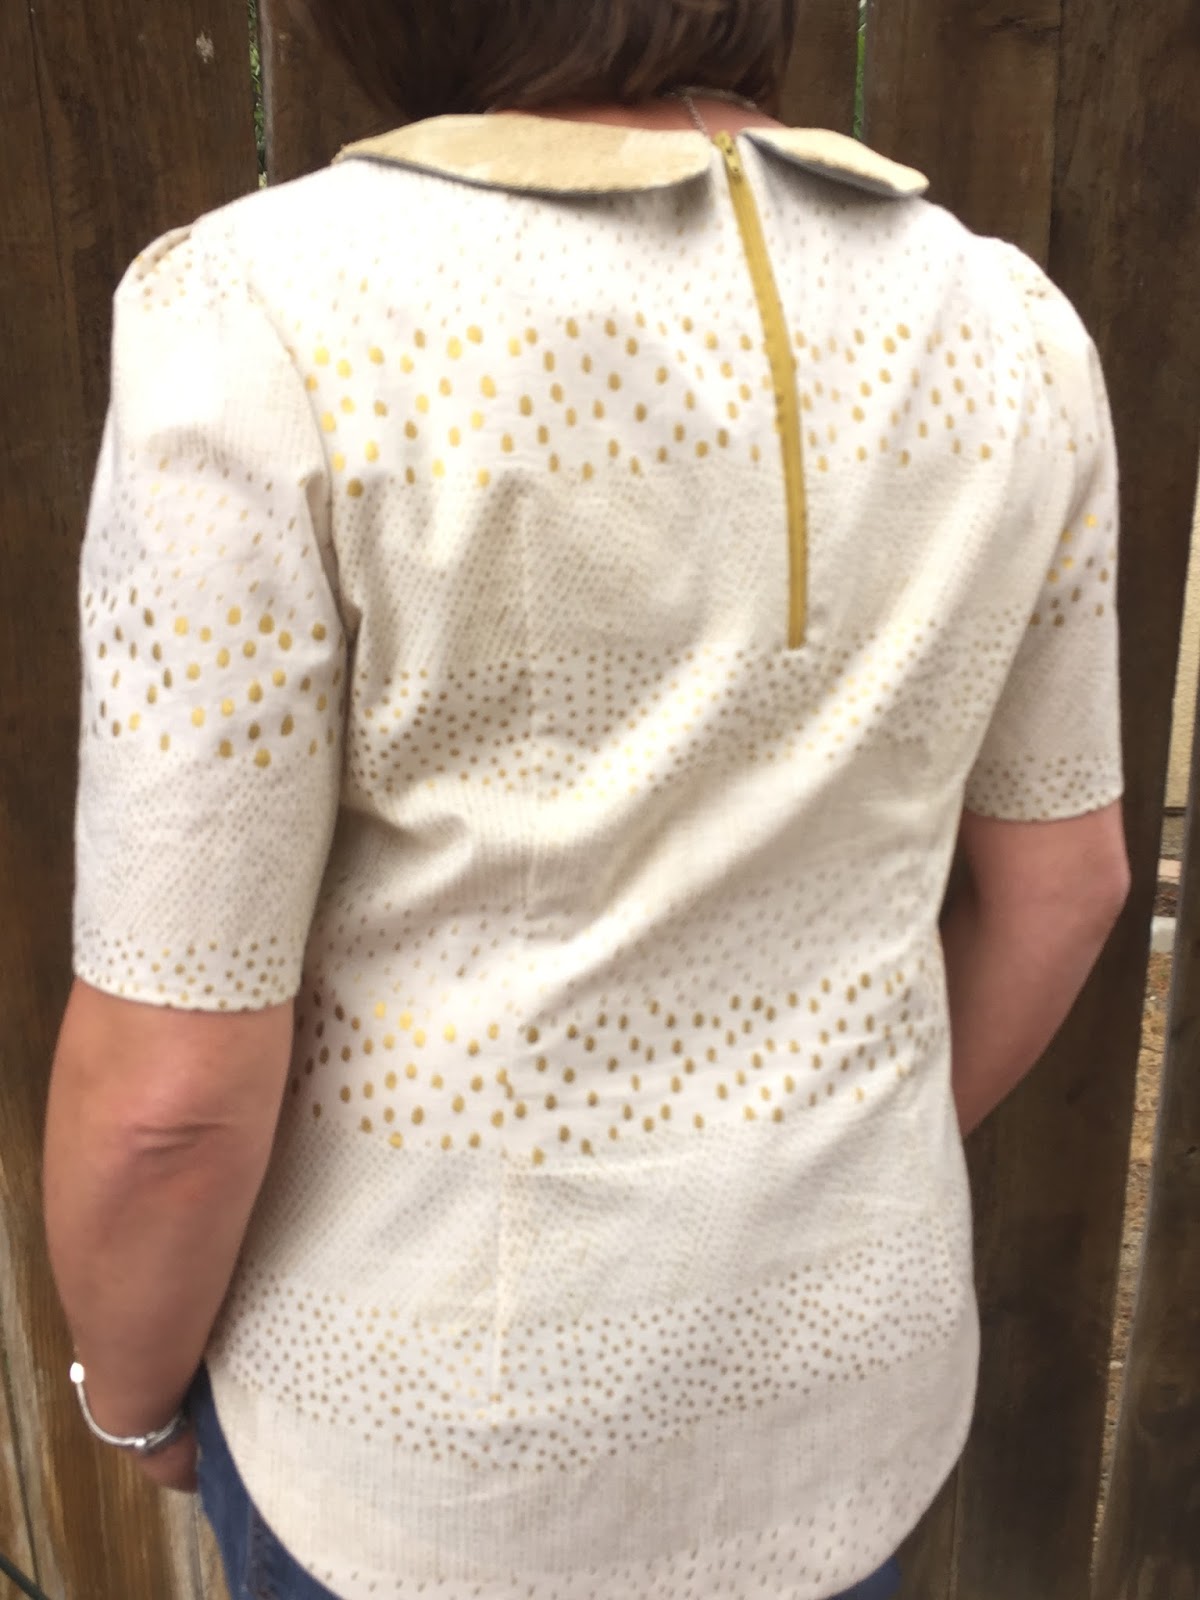
Here's my finished Orla Blouse.
It has some interesting details like the collar for starters.
The front has lovely partial princess seams too.

The back not only has a zipper but it also has 4 darts.
Two on the back and two on the top of the shoulder for better shaping.
Sorry this photo is fuzzy, I'll have to speak with my photographer.
I chose Japanese fabric for the blouse by Eri Shimatsuka called Pisaraita.
You can purchase the fabric from this Etsy store.
I purchased my fabric at Road to California,
and probably paid waaaay too much for it.

The lace overlay is from Britex Fabrics in San Francisco.
This store is to DIE for.
They have 4 floors of all things related to sewing.
The 4th floor is my favorite,
that's where you can get remnant pieces of
deliciously expensive fabric.

I hand basted the lace overlay onto the collar for stabilization.
I learned this little technique last year when I made my daughter's
wedding dress.

I inserted the zipper with Tilly's incredibly clear & concise instructions.
The instructions come in the most fabulously designed booklet
with real photographs and step by step instructions.
You can find a photo of the booklet below.
They make any other pattern company look sloppy.


This is what I got after clipping all the curves in the collar.
Doesn't this make the most beautiful confetti?

I used my paper bone folding tool to turn the collar right side out.

Then I carefully pressed with a silk ironing cloth.

Here's the completed collar.
In the background you can see the awesome instruction booklet.

Here's a few more photographs with the collar attached.
I chose to use a contrast fabric for the underside of the collar.

Happy sewing!


